


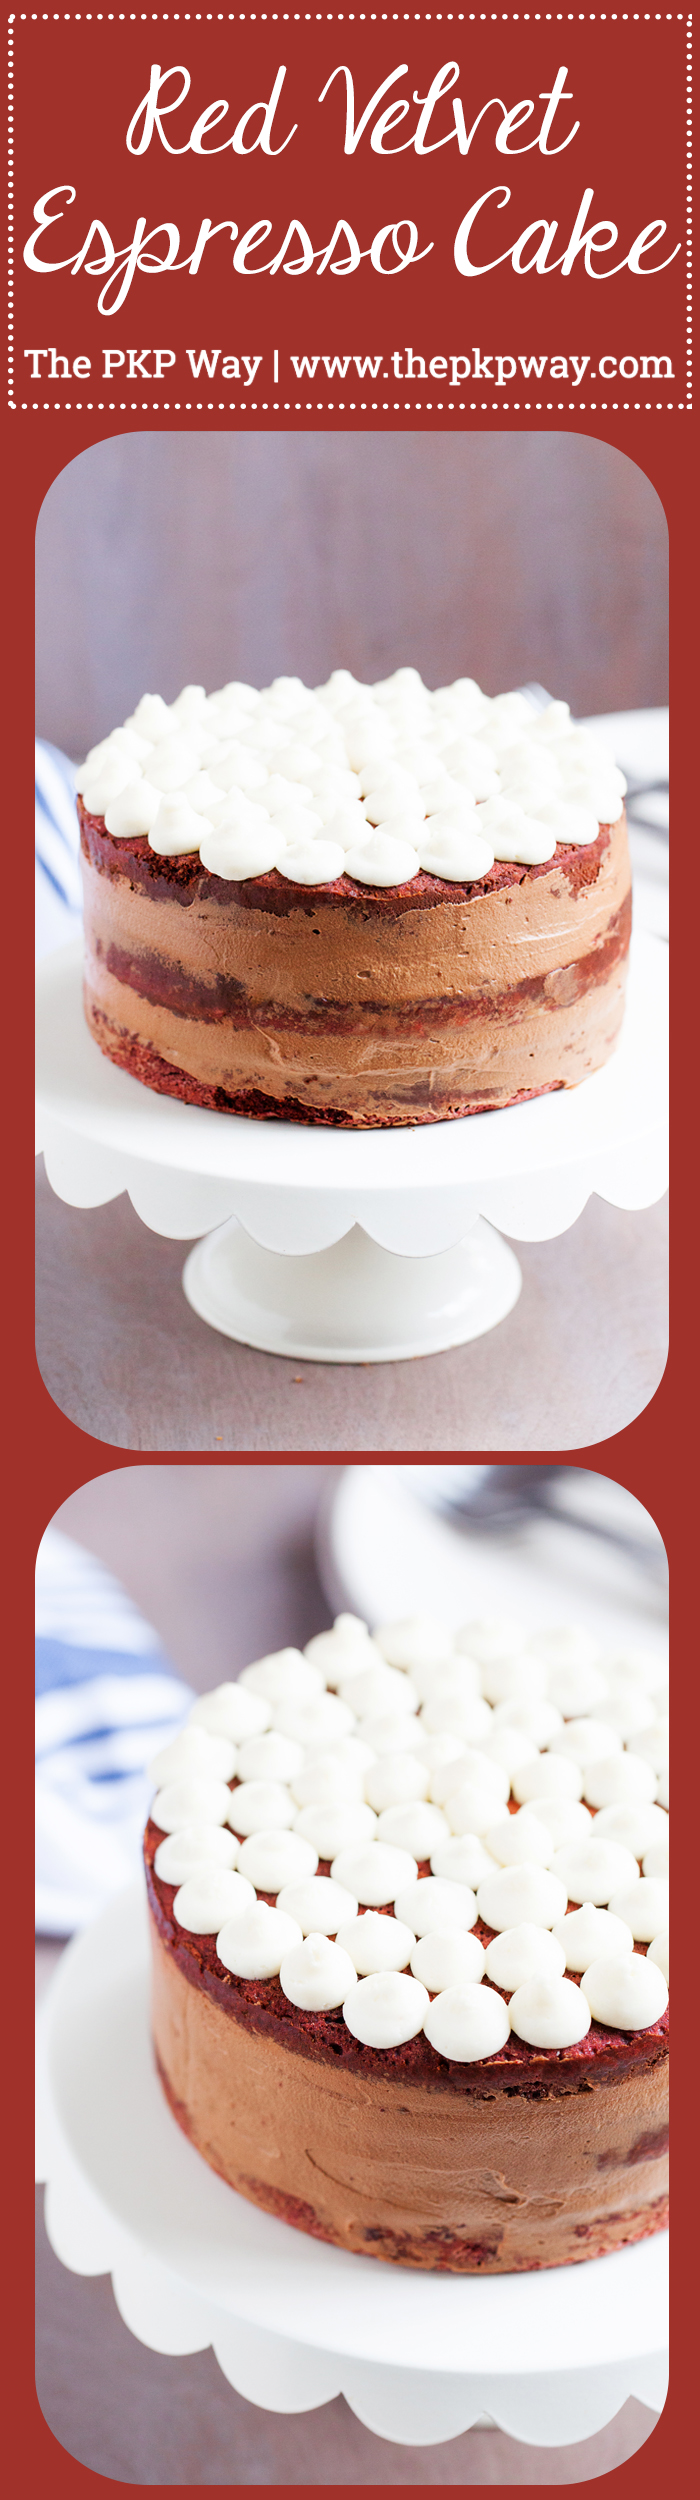

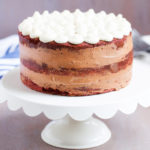
A to-die-for combination, this Red Velvet Espresso Cake has three delicious layers of red velvet cake, filled with fluffy espresso cream in between, and topped with sweet and tangy cream cheese frosting!
 We celebrated Warren’s 30th birthday last week! Happy birthday, Warren! 2016 began with us planning fairly eventful ways for each of us to ring-in our third decades. As you know I got what I wanted, but we have much more eventful things going on in our lives right now that take precedence over what Warren wanted initially (Vegas!). So, for his birthday this year, we had a nice quiet dinner at home. A no fuss, just us kind of night. It’s the little things right?
 For the birthday cake, I baked Warren this Red Velvet Espresso Cake. It’s three delicious layers of red velvet cake, filled with a fluffy espresso cream in between, and topped with a sweet and tangy cream cheese frosting. YUM!
 Now, red velvet cake with cream cheese frosting is delicious. BUT red velvet cake with espresso cream and cream cheese frosting is I’ve-died-and-gone-to-heaven amazing!
 You guys, I was scraping the espresso cream and cream cheese frosting with the leftover cake scraps for goodness sake! So so good :)
 To complete dessert, with the Red Velvet Espresso Cake, we had a delicious cup of coffee. I brewed the perfect cup of coffee for each of us with our new toy, the OXO On 9-Cup Coffee Maker. We are loving this new coffee maker because it replicates the pour-over method without paying $3-$5 per cup!
 It comes with a measuring scoop so you know exactly how much coffee to add based on the amount of water you add.
 It has precise temperature control so that the coffee is brewed perfectly between 197.6°F and 204.8°F, and a rainmaker showerhead so that water is evenly dispersed over the coffee grounds for uniform saturation and full flavor extraction.
 The OXO On 9-Cup Coffee Maker makes it easy to select the correct cup range. By selecting the cup range, I’m telling the coffee maker the exact brewing time for optimal extraction.
 One of my favorite features is the little coffee mug icon that shows up when it’s done brewing. Once the mug shows up, the timer begins, letting you know how long it’s been since the coffee finished brewing. In the picture below, the coffee has already finished brewing for 5 minutes. OXO recommends drinking the coffee within 1 hour of brewing.
 And so, with a quiet dinner, a slice of my Red Velvet Espresso Cake, and a cup of freshly brewed coffee, Warren rang in his third decade of life. Happy birthday, honey!

Red Velvet Espresso Cake
Ingredients
Red Velvet Cake
- 1 ⅛ cups bread flour
- 1 ½ teaspoons baking soda
- ¾ teaspoon baking powder
- 6 egg whites
- 3 teaspoons vanilla
- ⅛ cup vinegar
- ⅛ cup liquid red food coloring
- ¾ cup unsalted butter
- ¾ cup sugar
- ¾ cup natural (not Dutch-processed) unsweetened cocoa powder, sifted
Espresso Filling
- ½ cup dark or semi-sweet chocolate chips
- 1 tablespoon instant coffee or espresso
- 1 cup heavy cream
Cream Cheese Frosting
- 8 ounces brick-style cream cheese, room temperature
- ½ cup unsalted butter, room temperature
- 1 teaspoon vanilla extract
- 3 cups confectioners’ sugar, sifted
- Salt to taste
Instructions
Red Velvet Cake
- Preheat the oven to 350°F and grease and flour three 6-inch round cake pans.
- In a medium bowl, sift together the flour, baking soda and powder. Set aside.
- In a medium bowl whisk together the egg whites, vanilla, vinegar, and color. Set aside.
- In a microwave-safe bowl, melt the butter in a microwave for 20 – 30 seconds. Add the sugar and cocoa powder and stir until smooth. Transfer to a large bowl.
- To the butter mixture, alternate the flour and liquid mixture.
- Divide the batter evenly between the prepared pans (no more than ½ full). Bake for 20 – 22 minutes, until a toothpick inserted in the center comes out clean. Allow to cool in the pans for 10 minutes. Run a thin knife or offset spatula along the side of the cake. Invert the pans and remove the cakes from the pans. Transfer cakes to a cooling rack to cool completely.
Espresso Filling
- Add chocolate and coffee/espresso to a medium glass bowl. In a small sauce pan heat cream over medium heat until right before boiling. Pour hot cream over chocolate and let sit for 5 minutes. Whisk until smooth. If small specks of chocolate remain, heat in the microwave for 20 seconds at a time, whisking in between, until smooth.
Cream Cheese Frosting
- Using a stand mixer or a hand mixer, beat together the cream cheese and butter until smooth.
- Add the vanilla and beat until combined. Slowly add the sugar and beat until smooth. Add the salt to taste and beat until smooth.
Assembly
Level the tops of the cakes with a serrated knife. Place one layer on a cake stand and place the cake stand on a cake turntable.
Spoon or pipe on half of the filling. Roughly smooth out the filling with an offset spatula to create an even layer all the way to the edge. Repeat with a second layer of cake and filling.
Top with the final cake layer and gently press down so the filling slightly overflows. Using a dough scraper, gently scrape off the overflowing filling to create the “smear”&”rustic” look.
Pipe or spread on the cream cheese frosting on the top layer.
Storage
Store in the refrigerator for up to 3 days.
Disclaimer: OXO provided the equipment used in this post. As always, all opinions are 100% my own and do not necessarily reflect those of the brand. Thank you for supporting my work with the brands I love so I can continue to bring you new recipes!
Note: This page contains affiliate links that help make The PKP Way possible. Should you choose to purchase anything via those links, I will receive a small commission paid by Amazon, not you.
There seems to be step missing with the Expresso filling. It was liquidy, which would soggy the cake. I assumed most of the cream cheese filling was to be mixed with it since the only white in the picture was the icing on top. I then added more powdered sugar to make it form enough so the layers wouldn’t slide off each other, and saved enough to decorate the top.
There seems to be a step missing with the Expresso filling as it’s runny as directed. I assumed most of the cream cheese filling had to be added with enough in reserve to decorate the top of the cake.