


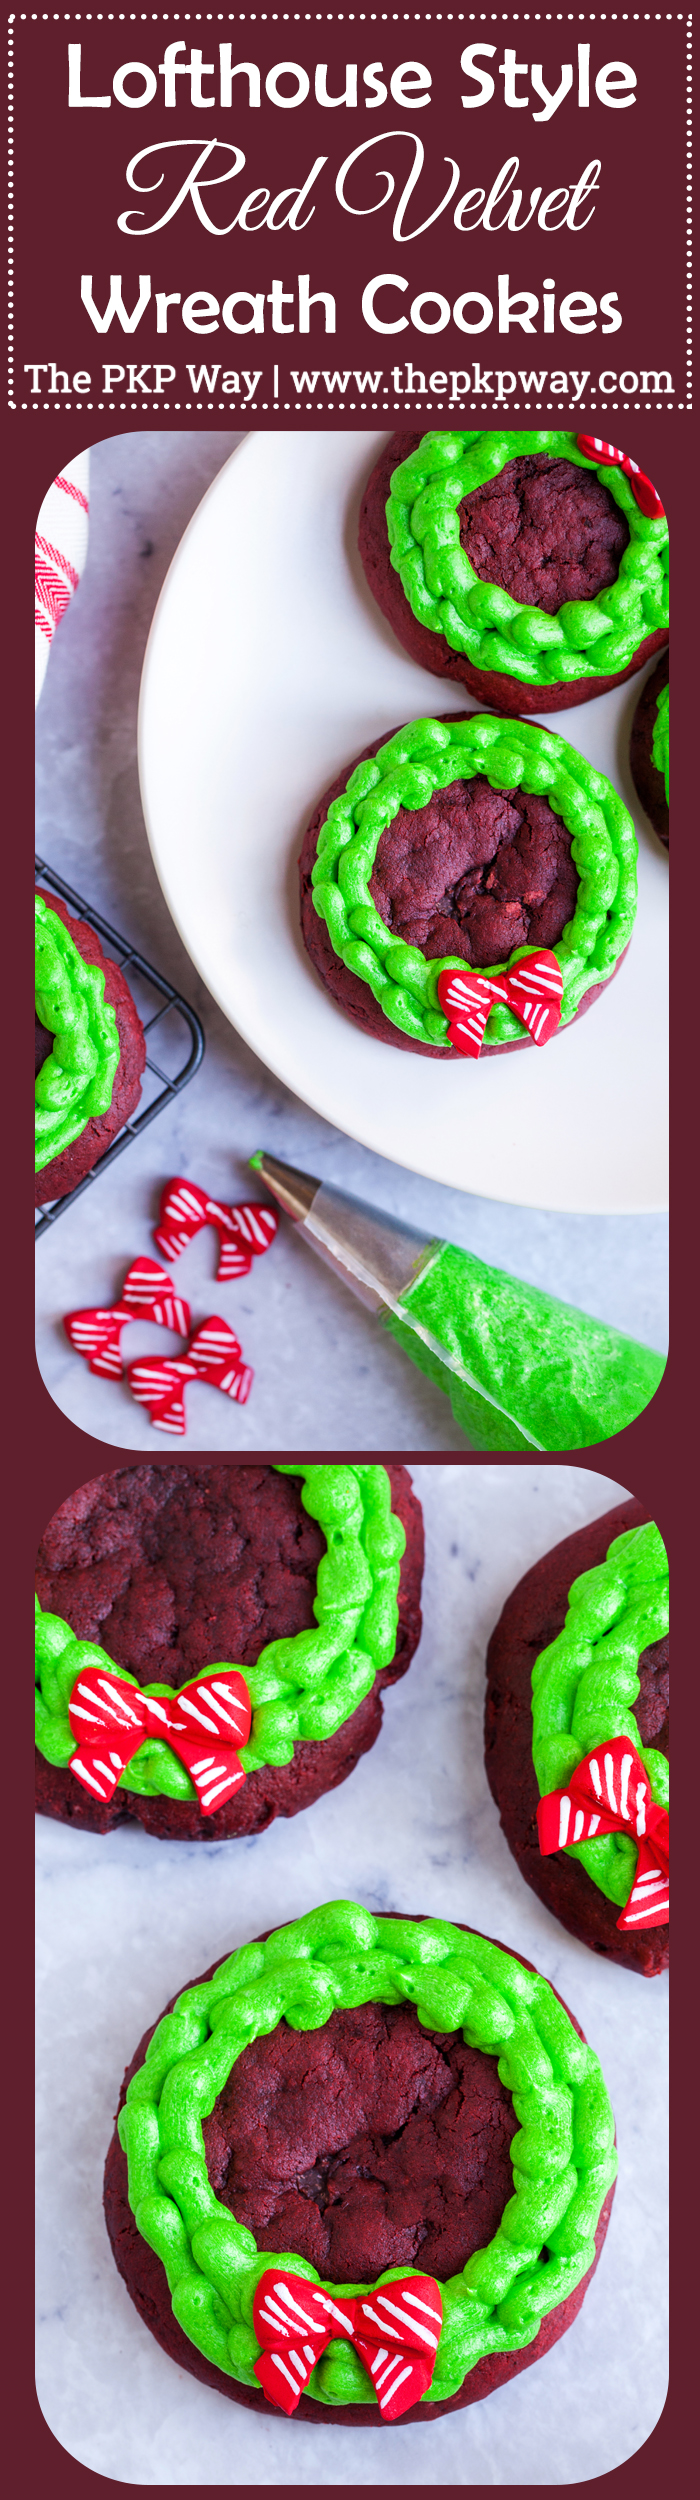
Chocolatey and buttery, these Lofthouse Style Red Velvet Wreath Cookies with cream cheese frosting will disappear at your next holiday party or cookie swap!
 When I posted Lofthouse Style Sugar Cookies during the Christmas season last year, I received such a great response that I thought I would post a similar yet different recipe this year :) The inspiration for these Lofthouse Style Red Velvet Wreath Cookies came when I spotted these sweet candy bows while grocery shopping one day. I pictured them on some sort of wreath-looking treat this holiday season, but just wasn’t quite sure what kind of treat just yet. I brainstormed on the drive back home and was able to narrow down treats from cakes, cupcakes, and sugar cookies. Finally, I decided on Lofthouse Style Cookies. Rather than simply decorating the Lofthouse Style Cookies from last year as a wreath, I finally decided to keep things interesting and challenged myself to making red velvet lofthouse style cookies.
 It wasn’t easy coming up with just the right combination of ingredients and it did take many tries and breaks, but I think I finally landed on the perfect recipe :D The outside of these Lofthouse Style Red Velvet Wreath Cookies are lightly crisped and the inside is soft and cake-like. The cookies are deliciously buttery and wonderfully chocolatey. In true Christmas spirit, I piped on cream cheese frosting and garnished with a sweet bow :D BUT to tell you the truth, I’d love these cookies any time of the year even without the cream cheese frosting.
 I used two different methods to bake these Lofthouse Style Red Velvet Wreath Cookies and you can choose whichever method you’d prefer and is easier for you. The first method, which is the one I include in the recipe card below, is the slice and bake method. I shaped the dough into a log before chilling and while the oven is pre-heating, I simply sliced the cookies and placed them on lined baking sheets. The second method was taking about 2 tablespoons of dough and rolling it into a ball, placing them on the baking sheet, and flattening each ball down with the palm of your hands. Though this method works just as well, you’ll need to slightly dampen your hands in between each pressing. Even with the chill time, the dough is still quite sticky. Damp hands help prevent the dough from sticking to your hands. I dampened my hands by keeping a wrung-out wet paper towel nearby. In between each pressing, i just gave the towel a squeeze.
Bring these Lofthouse Style Red Velvet Wreath Cookies to your next holiday party or cookie swap and watch them disappear!


Lofthouse Style Red Velvet Wreath Cookies
Ingredients
Cookies
- 2 cups all-purpose flour
- ¼ cup cocoa powder, sifted
- ¾ teaspoon baking soda
- ¼ teaspoon salt
- 1 egg, room temperature
- 1 teaspoon vanilla extract
- 1 tablespoon red velvet food coloring
- ¼ cup milk
- 1 cup (2 sticks) unsalted butter, room temperature
- ½ cup granulated sugar
- ¼ cup light brown sugar, packed
- Candies for decorating
Cream Cheese Frosting
- Ingredients
- 4 ounces (½ brick) cream cheese, room temperature****
- ¼ cup (½ stick) unsalted butter, room temperature
- ½ teaspoon vanilla extract
- 1 ½ cup confectioners' sugar, sifted
- 1 tablespoon cream or milk
- Green gel food coloring
Instructions
Cookies
- In a large bowl, whisk together the flour, cocoa powder, baking soda and and salt. Set aside.
- In a medium bowl, whisk together the egg, vanilla, food color, and milk. Set aside.
- In the bowl of a stand mixer fitted with the paddle attachment, beat the butter on medium until pale and creamy. Add the sugars and continue beating until fluffy. Reduce the speed to medium low and add the egg mixture. Stir until combined, scraping down the sides as necessary. Reduce the speed to low and slowly add the flour mixture, just until combined, scraping down the sides as necessary.
- Place a sheet of plastic wrap on the counter and transfer dough on top of the plastic. Cover with another sheet of plastic wrap and shape into a 12" log. Chill* in the refrigerator for at least 4 hours or overnight.
- Pre-heat oven to 350°F and line a baking sheet with parchment paper or silpat. Remove the dough from the refrigerator slice the log into 1/4-inch thick discs**. Transfer to the prepared baking sheet, leaving 2-inches in between each disc. Bake for 11 - 12 minutes, just until the edges begin to crisp slightly. Allow to cool on the baking sheet.
- Decorate cooled cookies with a green cream cheese frosting.*** Decorate or garnish with festive candy.
Cream Cheese Frosting
- Using a stand mixer or a hand mixer, beat together the cream cheese and butter until smooth.
- Add the vanilla and beat until combined. Slowly add the sugar and beat until smooth. Add the cream or milk a little at a time until desired consistency. Add the food coloring until desired color is reached. Cover and chill until ready to use.