


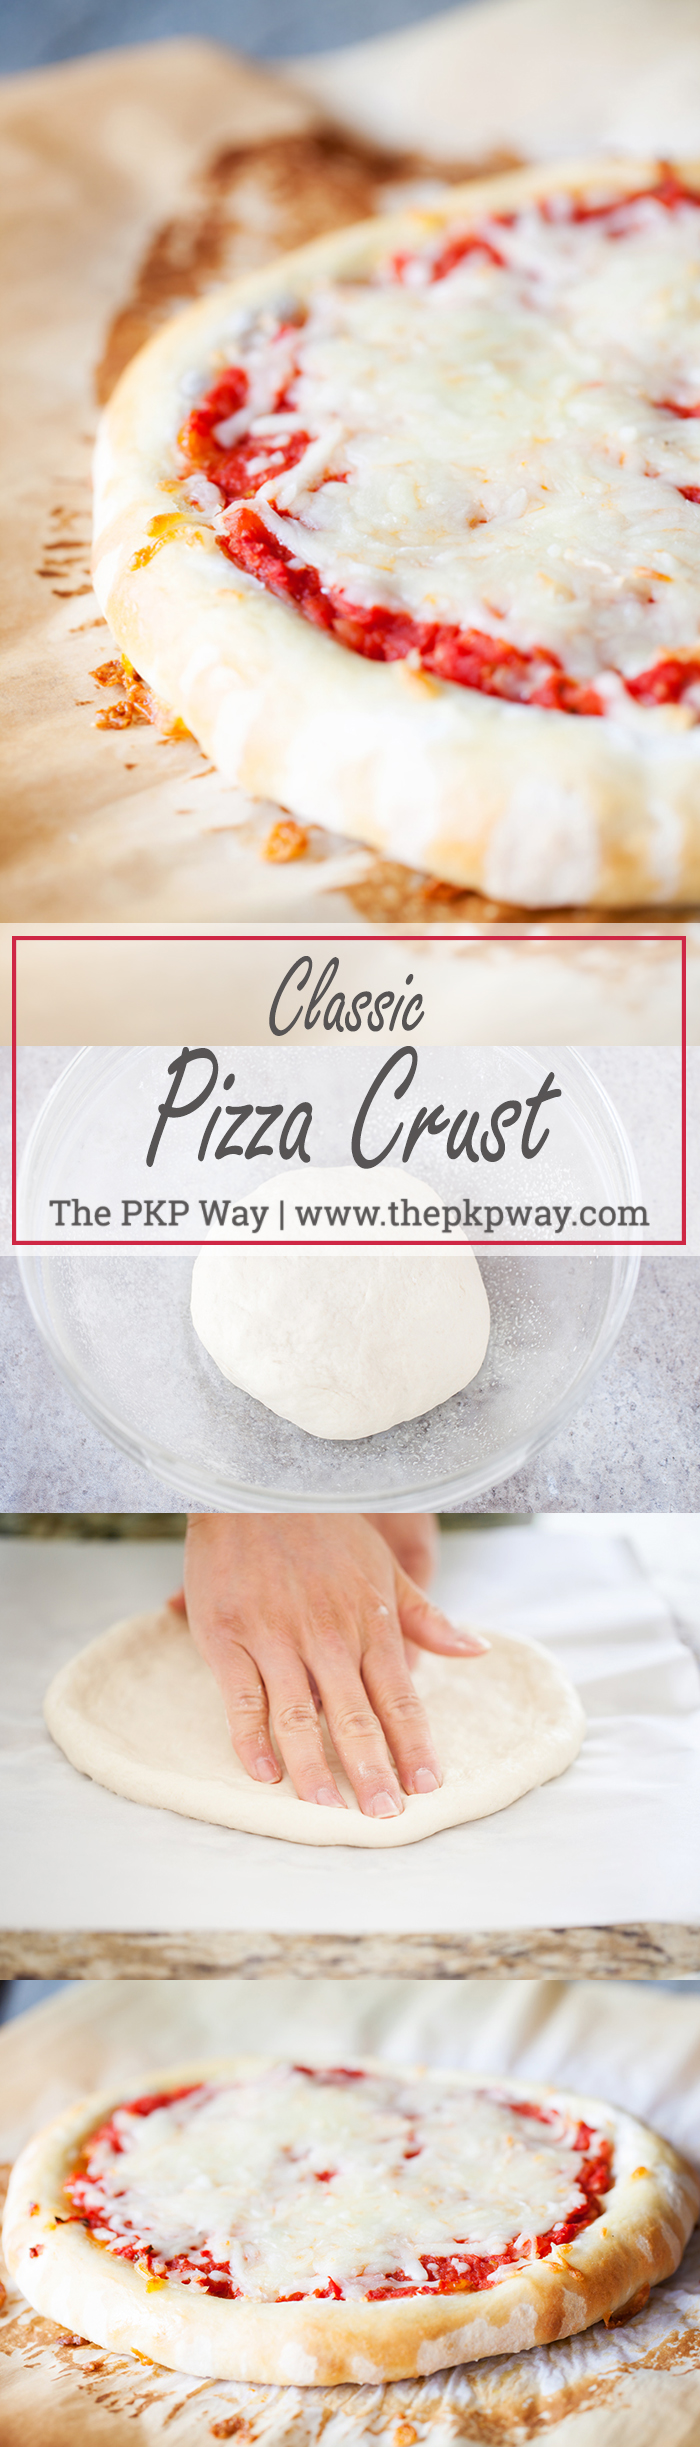
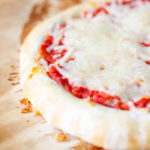
Versatile and easy to handle, this dough produces the perfect Classic Pizza Crust that’s crispy on the outside and tender on the inside.
 For the longest time, homemade pizza at our house began with a store bought crust. Whether it was a ball of dough, in a pressurized can, or par-baked, I’ve tried them all. It was time this self-proclaimed food blogger learn the craft of the Classic Pizza Crust.
I wanted to find a crispy on the outside, tender on the inside crust that would be fitting for any kind of sauce or topping. I also wanted to find a dough that was easy to handle so that I didn’t dread making it; something not too sticky and not too dry. Finally, I wanted to master “rolling” the dough out such that I didn’t have to dub it a “rustic” pizza due to its unique shape.
 I’m proud to say that I accomplished all that I sought to find and lived to bring you all the tips to a successful homemade crust.
Tips for a successful pizza crust
Pizza stone
The trick to a perfectly crisped crust is a hot surface to bake on. This is usually accomplished by heating a pizza stone in the oven while the dough is being prepared. When the dough is ready to be baked, it’s placed on the hot stone for instant heat contact, resulting in a crispy crust. If you don’t have a pizza stone, like yours truly, simply invert a baking sheet and place that in the oven while it’s preheating.
Pizza peel
A pizza peel is used to transfer pizza between the counter and oven. It usually has a long handle so that you don’t burn yourself when placing the pizza into the pizza oven. However, since I don’t have a pizza oven and am using a regular oven (like most of us), I didn’t think a peel was necessary. So, for my makeshift version, I used a wooden cutting board.
The dough
 The dough is a combination of two flours – all-purpose and cake. The cake flour makes the crust tender and the flour to water ratio makes for a very easy to handle and soft dough.
To make the dough even easier to handle, instead of working on a floured surface, I work on a large piece of parchment paper. Simply place the ball of dough onto the center of the paper and use your fingertips to flatten the ball into a disc. Then, with one hand, lightly hold down the center of the disc. With the other hand, push the edge of the dough in an outward motion and rotate the disc slightly (by rotating the paper) as you continue to work around the entire disc. The key to a perfectly round disc is continuously rotating. With every couple of pushes, rotate the parchment/dough. You’ll get a perfectly round crust every time!

Classic Pizza Crust
Ingredients
- 1 3/4 cup flour
- 1 cup cake flour
- 2 teaspoons sugar
- 1 1/2 teaspoon salt
- 1 1/4 teaspoon instant or rapid-rise yeast
- 1 cup water, warmed to 110 degrees
Instructions
- In a large bowl, whisk together the flours, sugar, salt, and yeast until well combined. Transfer to the bowl of a stand mixer fitted with the dough hook attachment. Turn the mixer onto medium and slowly pour in the warmed water.
- Mix on medium until a ball forms and the dough no longer sticks to the sides of the bowl. Transfer the dough to a lightly floured surface and knead a few times to form a soft dough. If the dough is too sticky, add more flour 1 tablespoon at a time. If the dough is too dry, add more water, 1 tablespoon at a time.
- Form a ball and place in a large greased bowl. Cover with plastic wrap and place in an off oven. Let rise for 1 1/2 hours. The dough should have doubled in size. Remove the bowl from the off oven.
- Place a pizza stone or an inverted baking sheet in the oven and preheat to 500°F.
- Cut a sheet of parchment paper, at least 16-inches long, and place on the counter. Divide the dough in half. Place one half on the center of the parchment paper. Leave the other half in the bowl and continue to cover with the plastic wrap.
- Roll the dough on the parchment paper into a ball. Using your fingertips, gently flatten the ball into a round disc. With one hand, lightly hold down the center of the disc. With the other hand, push the edge of the dough in an outward motion and rotate the disc slightly (by rotating the paper) as you continue to work around the entire disc*. Continue until a 12-inch disc is formed.
- Transfer the parchment with dough onto a pizza peel (or a wooden cutting board) and transfer the parchment onto the pre-heated pizza stone or baking sheet. Bake for 5 minutes. Use the peel or cutting board to return the parchment to the counter and spread on sauce of choice. Use the peel or cutting board to return the paper back to the oven and bake for 4 more minutes. Use the peel or cutting board to return the parchment to the counter and add on the toppings. Use the peel or cutting board to return the paper back to the oven and bake for 5 more minutes, until toppings are heated through.
- Repeat steps 6 and 7 with the remaining dough.
Notes
Modified from Cook’s Illustrated Cookbook
Note: This page contains affiliate links that help make The PKP Way possible. Should you choose to purchase anything via those links, I will receive a small commission paid by Amazon, not you.